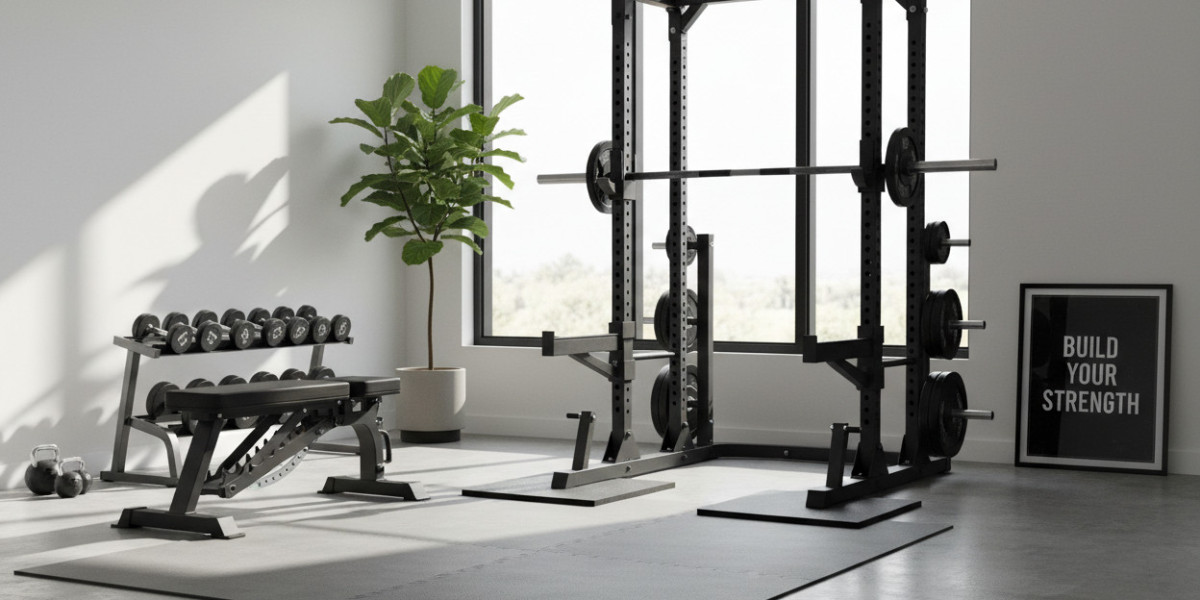
Building a home gym represents one of the smartest investments you can make in your fitness journey. Among all the equipment options available, a sturdy squat cage stands as the cornerstone of any serious strength training setup. This versatile piece of equipment transforms a spare room, garage, or basement into a professional-grade training facility where you can safely perform the most effective compound exercises.
Understanding the Foundation of Strength Training Equipment
A power rack serves as your safety spotter and exercise platform rolled into one. Unlike working out at a commercial facility where you're competing for equipment during peak hours, having your own rack means unlimited access to perform heavy squats, bench presses, and overhead movements whenever your schedule permits.
The basic structure consists of four vertical posts connected by horizontal beams, creating a cage-like frame. What makes this equipment invaluable are the adjustable safety bars or pins that catch the barbell if you can't complete a repetition. This safety feature allows you to push your limits without requiring a training partner.
Key Features That Define Quality Construction
When evaluating different models, the gauge of steel used in construction matters significantly. Commercial-grade units typically use 11-gauge or thicker steel, providing the stability needed for heavy lifting. The posts should be at least two inches by two inches, with three-inch posts offering even greater stability for serious lifters.
Weight capacity ratings vary considerably across models. Entry-level racks might support 500-700 pounds, which works for beginners. However, investing in a home gym power rack with a 1,000-pound capacity or higher ensures your equipment won't become limiting as your strength increases over the years.
Height considerations depend on your ceiling clearance. Standard racks measure around 80-90 inches tall, but shorter models accommodate basements with lower ceilings. Measure your space carefully, accounting for the barbell length when performing overhead movements.
Essential Attachments and Expansion Options
The beauty of modular rack systems lies in their expandability. Pull-up bars come standard on most models, but look for options with multiple grip positions to target different muscle groups. Some units feature multi-grip bars that allow neutral, wide, and close-grip variations.
J-hooks hold your barbell at the starting position for squats and presses. Quality J-hooks feature UHMW plastic coating to protect your barbell's knurling. Look for models where these hooks adjust easily and lock securely at each height position.
Dip station attachments bolt onto the rack's frame, adding another bodyweight exercise to your arsenal. Landmine attachments create angular pressing and rowing movements. Weight plate storage pegs keep your training area organized while adding stability to the overall structure.
Safety Features You Shouldn't Compromise On
Adjustable safety spotter arms represent the most critical component. These horizontal bars should adjust in one-inch increments, allowing precise positioning for different exercises and user heights. When bench pressing alone, these bars literally become a life-saving feature.
Band pegs positioned at the base of some racks let you incorporate accommodating resistance into your training. This advanced technique helps develop explosive power and works through sticking points in your lifts.
Bolt-down capability matters if you're lifting extremely heavy weights. While many racks remain stable through sheer weight and proper use, the option to secure your equipment to the floor provides additional peace of mind during max effort lifts.
Space Planning for Your Training Area
A full-size rack requires roughly eight feet of depth when accounting for the rack itself plus space to walk around behind it for squats. Width typically ranges from four to five feet. Remember to add at least seven feet of length in front for bench pressing and other movements.
Half racks occupy less floor space by eliminating the rear posts, making them suitable for tighter areas. However, they sacrifice some exercise options and stability compared to full cages. Foldable models mount to walls and swing out when needed, then fold flat when not in use, though these generally support lower weight capacities.
Comparing Budget Considerations Across Price Points
Entry-level racks starting around $300-500 work for beginners focused on basic compound movements. Mid-range options between $600-1,200 offer better steel gauges, higher weight capacities, and more attachment compatibility. Premium models exceeding $1,500 provide commercial-grade construction that will outlast your training career.
Consider the true cost of ownership beyond the initial purchase. Quality racks require minimal maintenance beyond occasional bolt tightening. Cheaper units might need replacement parts or complete replacement within a few years, making them more expensive long-term investments.
Installation and Assembly Insights
Most racks arrive in flat-pack boxes requiring assembly. Budget two to four hours for setup, depending on the model's complexity. You'll need basic tools including wrenches, sockets, and possibly a drill. Having a helper makes the process much easier, especially when positioning uprights and aligning bolt holes.
Follow torque specifications carefully during assembly. Overtightening can strip threads, while insufficient tightening creates dangerous instability. After initial assembly, recheck all connections after the first few training sessions as bolts may settle.
Matching Equipment to Training Goals
Powerlifters prioritizing maximum strength development need racks with the highest weight capacities and robust safety systems. CrossFit enthusiasts benefit from racks with pull-up bar variations and quick-adjust J-hooks for efficient transitions between movements.
Bodybuilders appreciate attachment compatibility for cable systems and specialized angle work. General fitness enthusiasts typically find mid-range models with standard attachments perfectly adequate for achieving excellent results across all training styles.
Maximizing Your Investment's Longevity
Regular maintenance extends your equipment's lifespan significantly. Wipe down the frame periodically to prevent sweat corrosion. Apply light machine oil to adjustment pin mechanisms annually to maintain smooth operation. Inspect welds and connection points quarterly for any signs of stress or damage.
Proper flooring underneath your rack protects both your equipment and your floor. Rubber mats designed for weightlifting absorb impact, reduce noise, and prevent the rack from shifting during use. They also protect concrete floors from dropped plates and basement floors from moisture damage.
Making the Final Selection
Your ideal rack balances current needs with future growth potential. Consider where you'll be in your training journey five years from now. Buying equipment that matches your beginner status might save money today but create limitations tomorrow. Conversely, purchasing features you'll never use wastes resources better allocated elsewhere in your gym.
Read verified customer reviews focusing on long-term durability rather than initial impressions. Pay attention to customer service experiences, as even quality equipment occasionally requires replacement parts or technical guidance.
The right power rack becomes the anchor of your home training space, providing decades of reliable service while you build strength, confidence, and the body you've always wanted. Take time to research thoroughly, measure your space accurately, and invest in quality that matches your commitment to fitness.